































How to Build an FPV Drone in India – Complete Guide
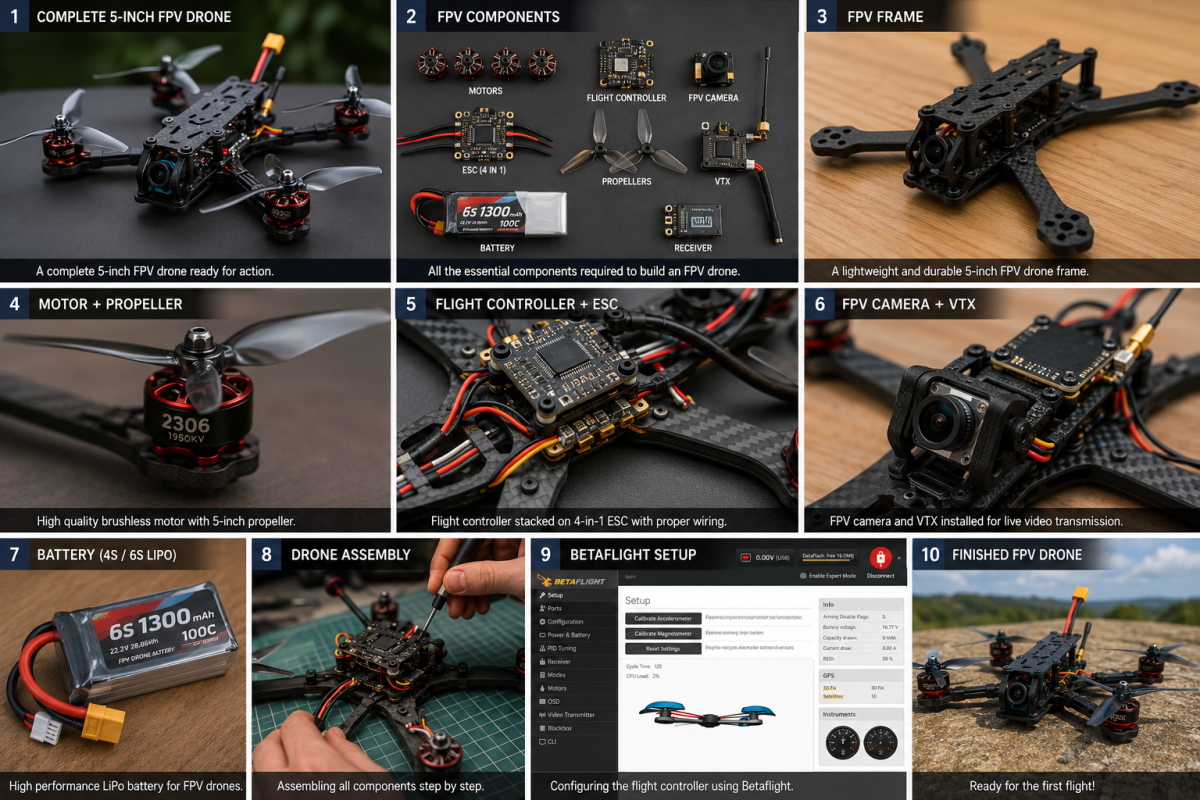
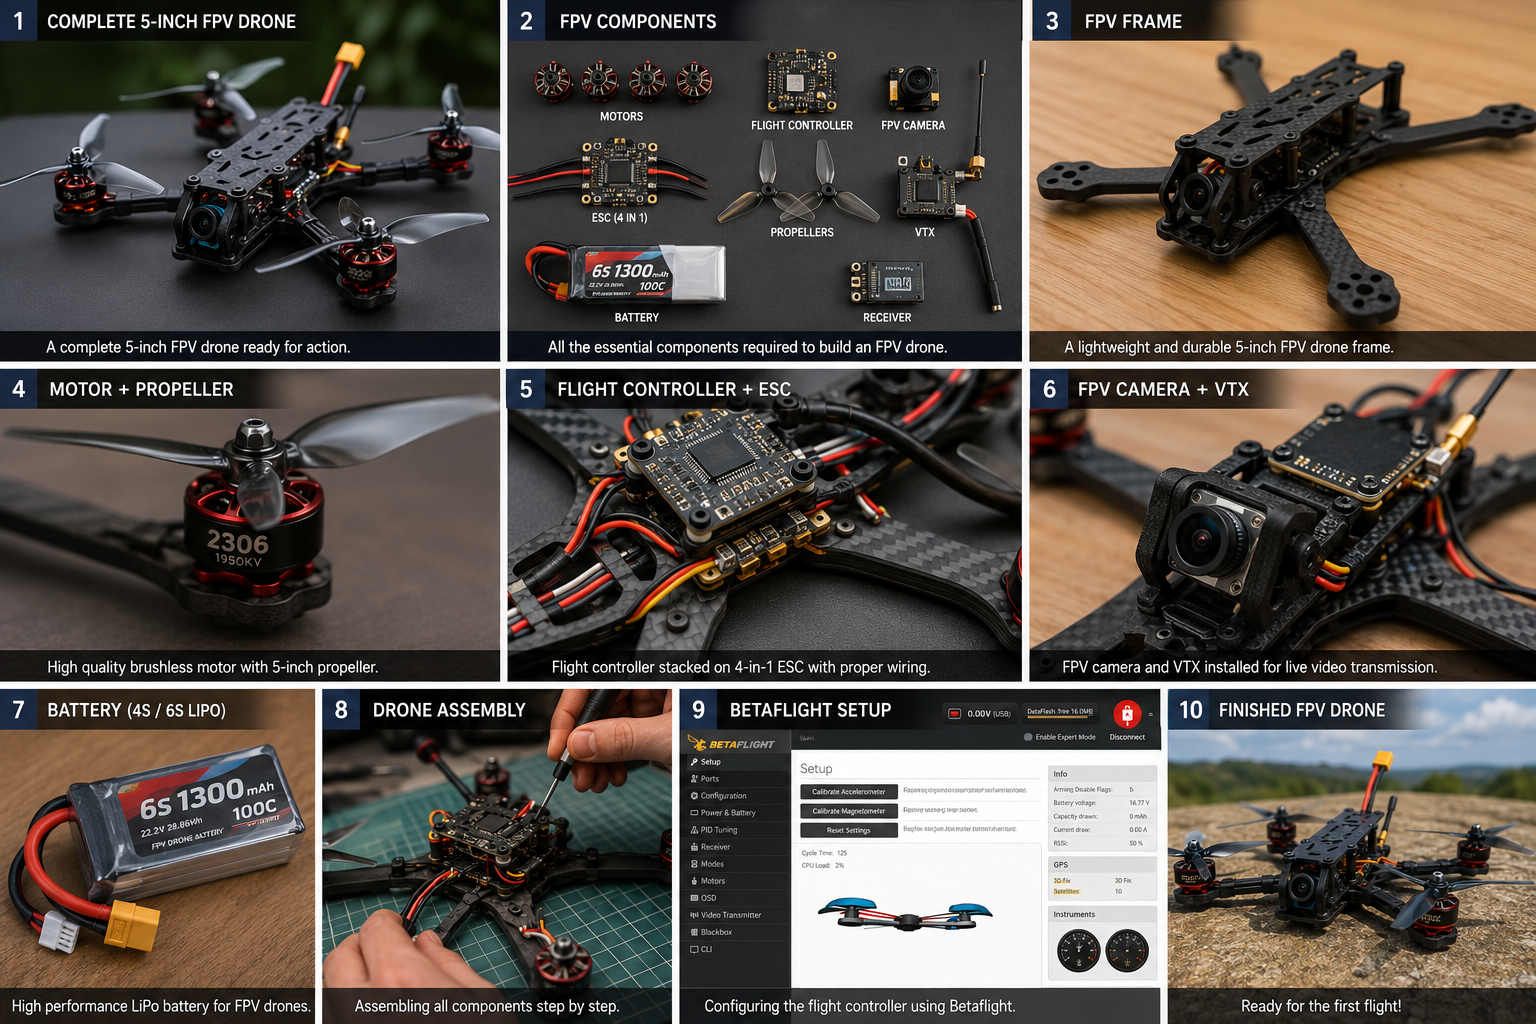
Building your own FPV drone is one of the best ways to understand how FPV drones work. From choosing the right frame and motors to configuring the flight controller and tuning the drone, building an FPV drone gives you complete control over your setup.
In this guide, we will explain how to build an FPV drone in India, what components you need, how to assemble them, and how to configure your drone for its first flight.
What Is an FPV Drone?
FPV stands for First Person View. Unlike a traditional camera drone, an FPV drone allows the pilot to see a live video feed from the drone through FPV goggles or a monitor.
FPV drones are popular for:
- Freestyle flying
- Racing
- Cinematic flying
- Long-range flying
- Drone photography and videography
- DIY and experimental projects
The biggest advantage of building your own FPV drone is that you can select every component according to your requirements.
Components Required to Build an FPV Drone
Before starting your build, you need the following major components:
1. FPV Frame
The frame is the main structure of the drone. It holds the motors, flight controller, ESC, battery and other components.
Common FPV frame sizes include:
- 3.5 inch
- 5 inch
- 6 inch
- 7 inch
- 8 inch
- 10 inch
For beginners, a 5-inch FPV drone is one of the most common choices because components are easily available and it offers a good balance between performance, durability and cost.
2. Motors
The motors provide the thrust required to fly the drone.
Motor selection depends on:
- Frame size
- Propeller size
- Battery voltage
- Motor KV
- Drone weight
- Desired flight characteristics
For example, a typical 5-inch FPV build commonly uses four brushless motors designed for 5-inch propellers.
3. ESC
The Electronic Speed Controller (ESC) controls the speed of each motor.
You can use:
- 4-in-1 ESC
- Individual ESCs
A 4-in-1 ESC is commonly preferred for modern FPV builds because it keeps the wiring cleaner and saves space.
4. Flight Controller
The flight controller is essentially the brain of the FPV drone.
It processes information from the gyro and other sensors and sends commands to the ESCs.
Popular flight controller firmware options include:
- Betaflight
- INAV
- ArduPilot
For a typical freestyle or racing FPV drone, Betaflight is one of the most commonly used firmware options.
5. Propellers
Propellers convert the motor’s rotation into thrust.
You should select propellers according to your motor, frame and battery combination.
Propellers are generally described using numbers such as:
5 × 4.3 × 3
The numbers indicate the approximate diameter, pitch and number of blades.
Always check motor and propeller compatibility before your first flight.
6. FPV Camera
The FPV camera provides the live video feed used for flying.
There are two major types of FPV systems:
Analog FPV
- Lower cost
- Lightweight
- Low latency
- Large selection of compatible components
Digital FPV
- Higher image quality
- Better overall video experience
- Usually more expensive
Choose the system according to your budget and requirements.
7. VTX
The Video Transmitter (VTX) sends the camera’s video signal to your FPV goggles or receiver.
VTX power and frequency should be configured correctly according to your FPV system and applicable local rules.
8. Radio Receiver
The receiver connects your drone to your radio transmitter.
Popular options include modern ExpressLRS (ELRS) systems, which are widely used for FPV because of their range, responsiveness and flexibility.
9. FPV Goggles
FPV goggles allow you to see the live video feed from your drone.
Your goggles must be compatible with your chosen FPV video system.
10. Battery
The battery powers the entire drone.
Common FPV battery configurations include:
- 4S
- 6S
Battery capacity is measured in mAh.
A higher-capacity battery can provide more flight time, but it also adds weight. Therefore, battery selection is always a balance between flight time and performance.
Step-by-Step FPV Drone Assembly
Step 1: Assemble the Frame
Start by assembling the frame according to the manufacturer’s instructions.
Make sure:
- All screws are properly tightened
- Arms are secure
- There is no unnecessary frame movement
- The flight controller mounting holes match the frame
Do not overtighten carbon-frame screws.
Step 2: Install the Motors
Install one motor on each arm.
Make sure the motor wires can reach the ESC without being unnecessarily long.
At this stage, do not install the propellers.
This is extremely important for safe configuration and testing.
Step 3: Install the ESC
Mount the ESC securely in the center of the frame.
Connect the four motors to the ESC.
If you are using a 4-in-1 ESC, the motor connections will generally be arranged according to the ESC’s motor numbering.
Always check the manufacturer’s wiring diagram because layouts can vary.
Step 4: Install the Flight Controller
Mount the flight controller above the ESC using the appropriate soft mounting hardware.
Pay attention to the arrow or orientation marking on the flight controller.
The front of the flight controller should correspond correctly with the front of the drone unless you intentionally configure a different board orientation in firmware.
Step 5: Connect the Flight Controller and ESC
Connect the ESC to the flight controller using the appropriate connector or soldered connections.
Depending on the hardware, connections may include:
- Ground
- Battery voltage
- Current sensing
- Motor signals
- Telemetry
Always follow the wiring diagram supplied with your specific FC and ESC.
Step 6: Connect the Receiver
Install your radio receiver and connect it to the appropriate UART on the flight controller.
For an ELRS receiver, configure the correct serial receiver settings in your flight controller firmware.
Keep the receiver antenna away from high-current wires and carbon structures where practical.
Step 7: Install the FPV Camera and VTX
Mount the FPV camera at the front of the drone.
For a freestyle drone, you can usually set the camera angle according to your flying style.
Connect the camera to the VTX or digital video system according to the manufacturer’s wiring diagram.
Make sure the VTX has appropriate cooling and is not covered by heat-generating components.
Configuring the Flight Controller
After completing the physical assembly, connect the flight controller to your computer using USB.
For a Betaflight-based build, open the Betaflight Configurator and connect to the flight controller.
Important Configuration Steps
Check:
- Flight controller orientation
- Receiver configuration
- Arm switch
- Motor configuration
- Motor direction
- Modes
- OSD
- Failsafe
- VTX settings
- Battery monitoring
Motor Testing
Before testing motors:
REMOVE ALL PROPELLERS.
Use the motor tab in the flight controller configurator to test each motor individually.
Confirm that:
- The correct motor responds
- Motors spin in the correct direction
- The motor order matches the firmware configuration
Never test motors with propellers installed.
Installing the Propellers
Once the motor direction and configuration are confirmed, install the propellers.
Pay close attention to the propeller orientation.
A wrong propeller direction can cause the drone to immediately flip when attempting to take off.
Before arming, perform one final check of all four propellers.
First Flight
For your first flight, choose a large open area away from people, vehicles, buildings and other obstacles.
Before takeoff:
- Check the battery
- Check the radio connection
- Confirm failsafe
- Confirm arm/disarm switches
- Check motor direction
- Check propeller orientation
- Check the FPV video feed
- Check that the frame and motors are secure
Start with a short hover and carefully observe the drone.
If the drone behaves unexpectedly, disarm immediately and inspect the build.
Common FPV Drone Building Mistakes
Choosing the Wrong Motor and Propeller Combination
Not every motor works well with every propeller. Consider motor KV, propeller size, battery voltage and overall drone weight together.
Incorrect Motor Direction
Incorrect motor direction can cause an immediate flip during takeoff.
Installing Propellers Too Early
Never configure or test motors with propellers installed.
Poor Wiring
Loose or exposed wires can cause shorts, interference or mechanical damage.
Ignoring Battery Safety
FPV batteries can deliver very high current. Use appropriate charging equipment, inspect batteries before use and never use a damaged or swollen battery.
Skipping Failsafe Configuration
Always configure and test failsafe before flying.
How Much Does It Cost to Build an FPV Drone in India?
The cost depends heavily on the type of drone and the components you choose.
A basic build can be relatively affordable, while premium digital FPV systems, high-performance motors and specialized components can significantly increase the total cost.
Your total budget may include:
- Frame
- Motors
- ESC
- Flight controller
- Propellers
- FPV camera
- VTX or digital air unit
- Radio receiver
- Battery
- Charger
- Radio transmitter
- FPV goggles
- Spare parts
If you are building your first FPV drone, it is usually better to choose a reliable and compatible component combination rather than simply selecting the cheapest parts.
Where to Buy FPV Drone Parts in India?
When building an FPV drone, component compatibility is extremely important.
At FPV Marketplace, you can find FPV and drone components for DIY builds, repairs and upgrades.
You can explore categories such as:
- FPV Frames
- Motors
- ESCs
- Flight Controllers
- Propellers
- FPV Cameras
- VTX Systems
- Receivers
- Batteries
- 3D Printed Parts
- Tools & Accessories
Choose components based on your drone size, flying style and power requirements.
Final Thoughts
Building an FPV drone yourself may seem complicated at first, but once you understand the purpose of each component, the process becomes much easier.
The most important things are component compatibility, correct wiring, proper configuration and safe testing.
If you are new to FPV, start with a proven 5-inch build and learn the basics before moving to more advanced long-range, cinematic or high-performance drones.
Build it. Tune it. Fly it.
Explore FPV drone components and build your next FPV drone with FPV Marketplace.